Oddameras.com
Vermeer Curved Plane Pinhole Camera 6 x 17 cm
This is a Vermeer Curved Pinhole Camera 6 x 17 cm ultra wide
landscape format. It's a nice piece of craft, made from well chosen
wood and metal. The curved film plane has a big advantage: the is no
vignetting, no light fall-off towards the edges, as all points on the
film plane are at equal distance from the pinhole. Vignetting occurs
with wide angles, even expensive ultra wide lenses show some
vignetting. A typical vignetting you will find here (link opens in a new widow).
Focal length: 90mm
Body: blue stained sycamore wood/ black birch front panel
Aperture equivalent: F 300
Angle of view: 90 degrees
Filter thread: 52mm
Size: 9x19x10,5cm (case), 12,5x19x11,5cm (total)
Weight: 700gr.
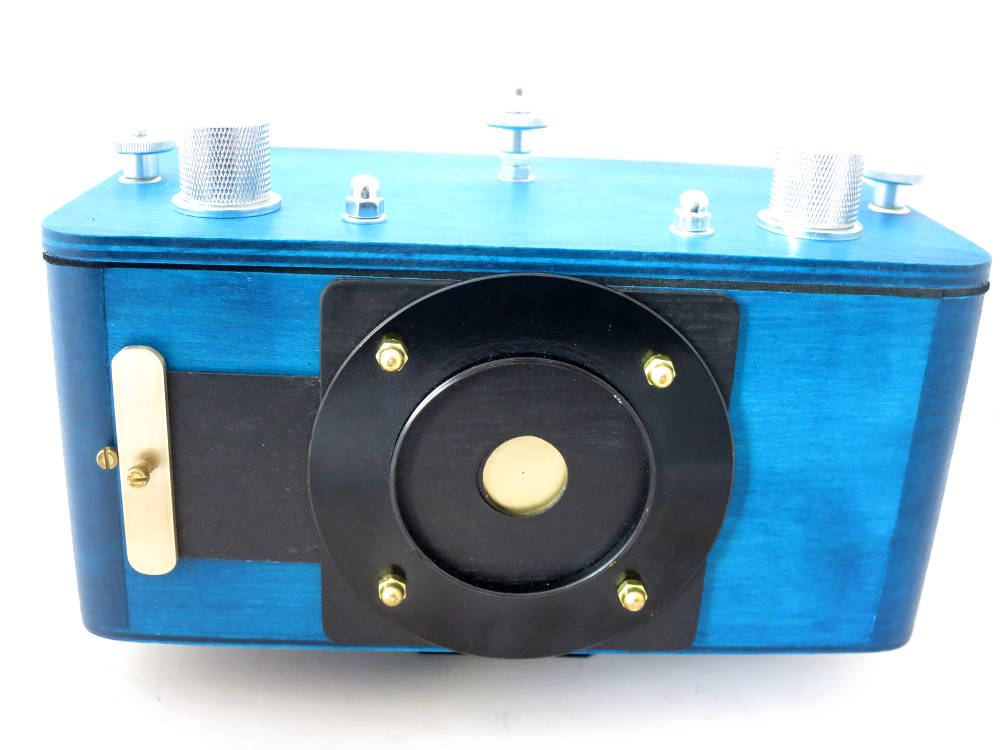
Camera front. Pinhole closed. There is a 52mm filter thread.
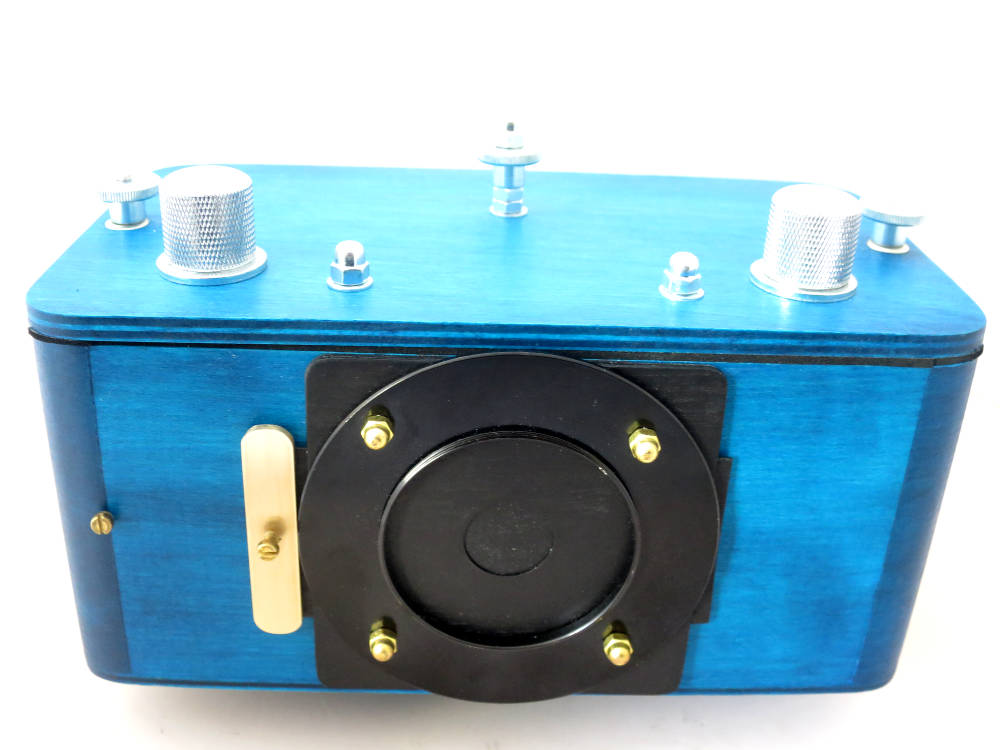
Pinhole open. There are two advance knobs, one for advancing the film, the second one can move the film back or straigthen it.
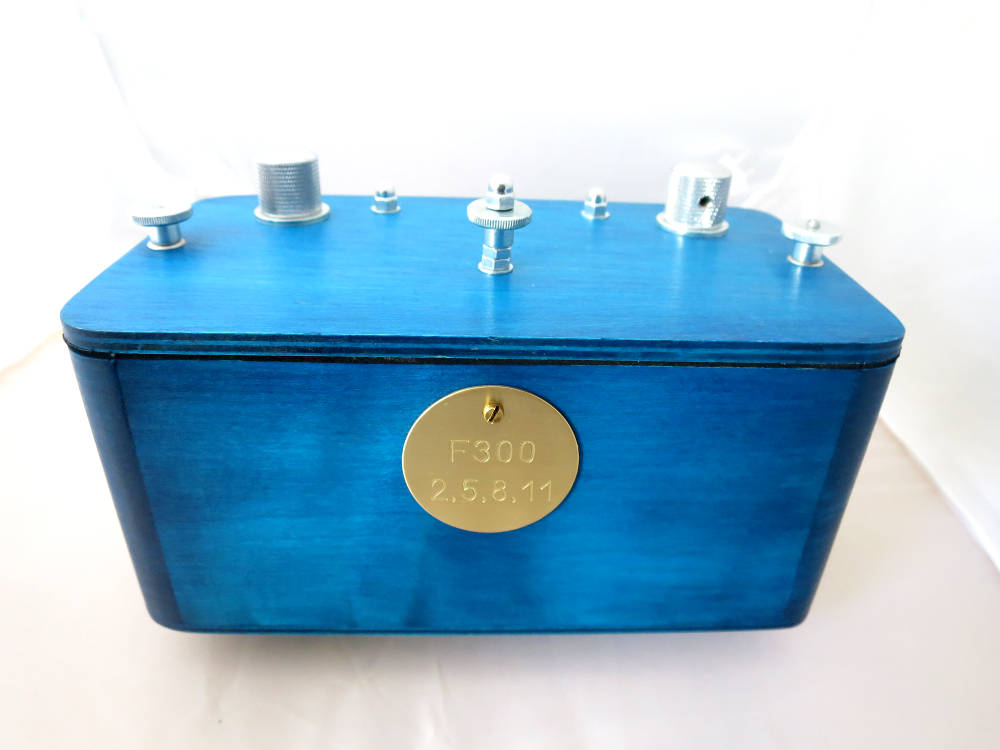
Camera
back, Red window with lid. On the lid: film number reminder, it's 2, 5,
8 and 11 to be in the red window. So you get 4 photos from a 120 roll
of film.

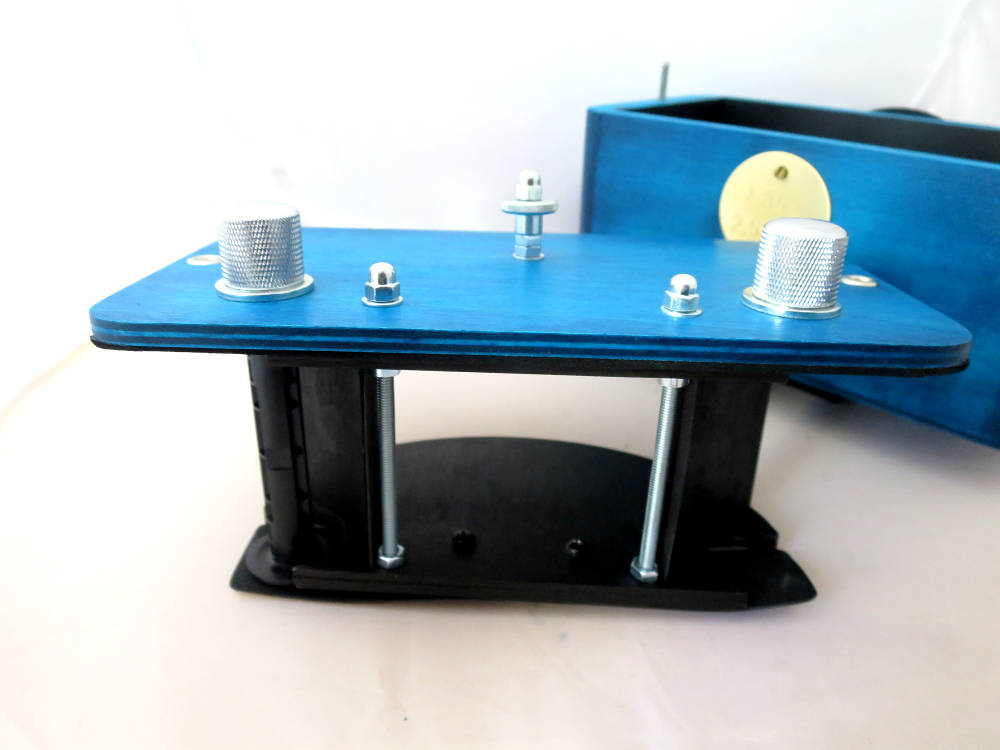
Camera bottom. I have installed a Manfrotto Quick Release Plate.
Camera interior. The two long silver screws will have to be painted black against reflections.
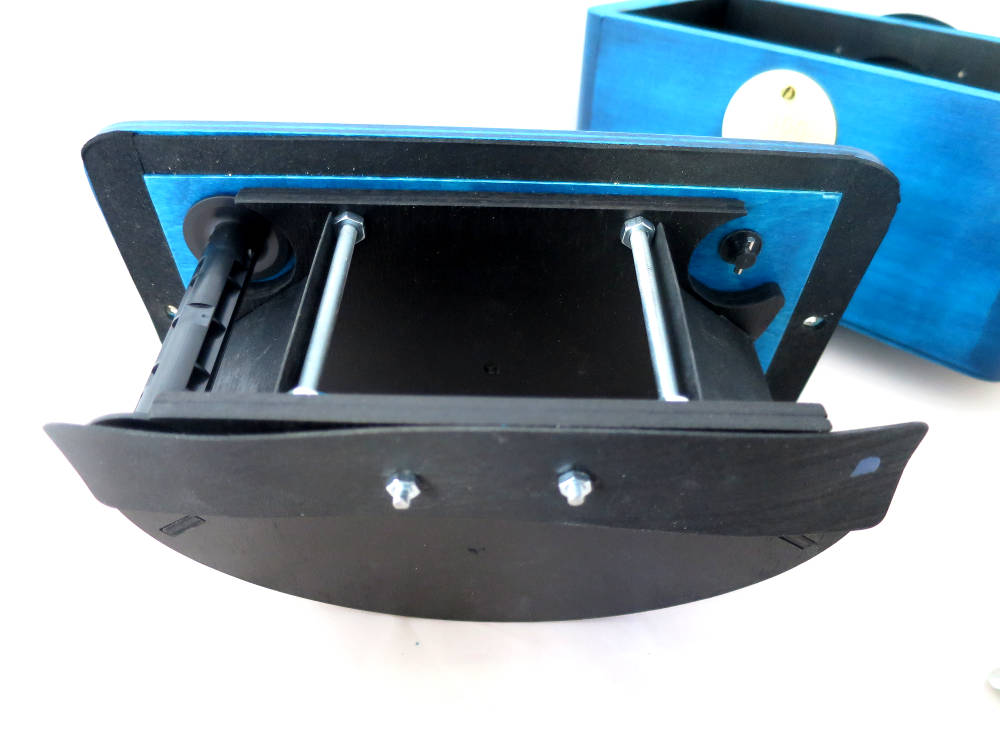
Camera bottom. The blue dot marks the wind spool emplacement.
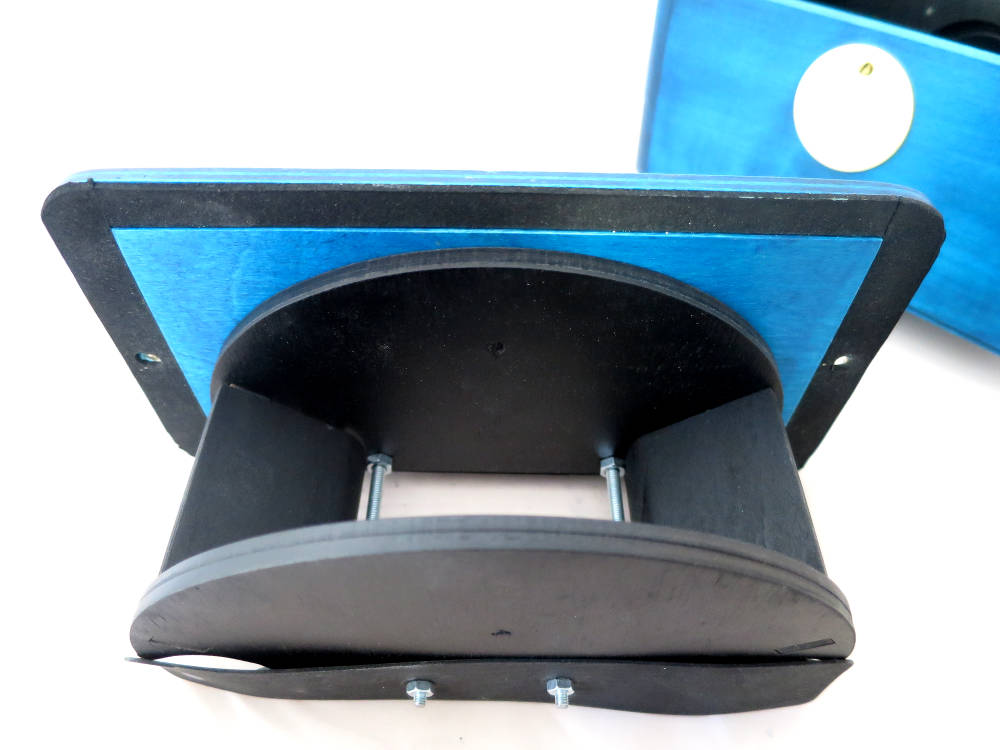
Camera interior, curved film plane.

Camera disassembled.
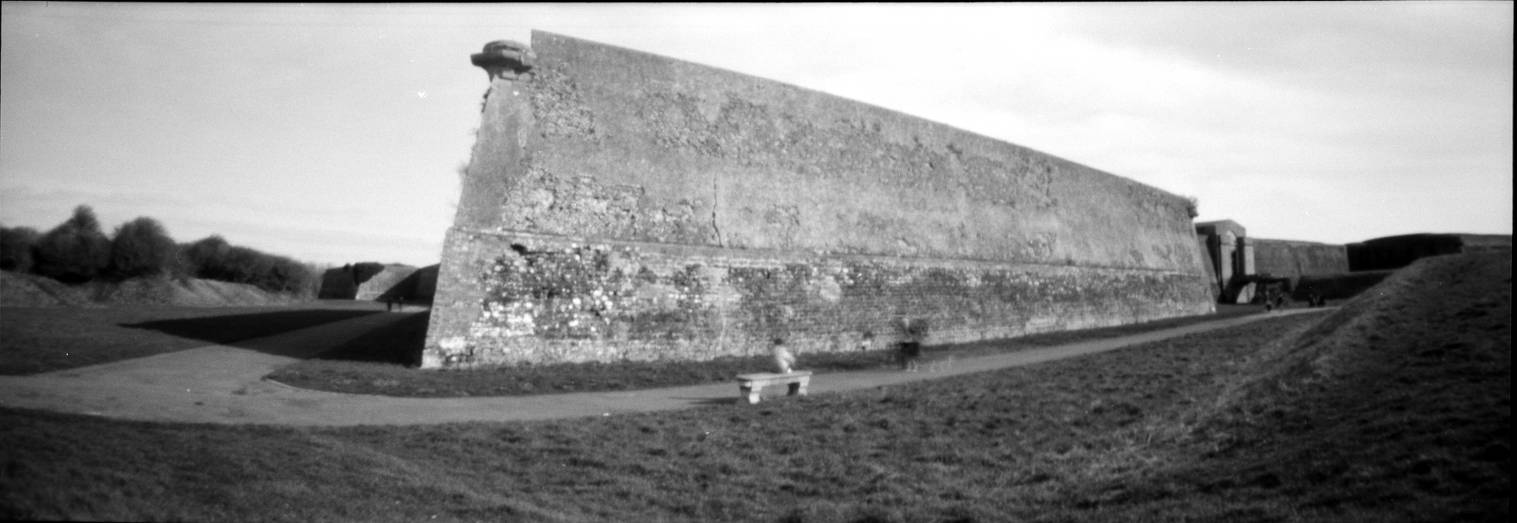
A picture taken with the camera. There is virtually no vignetting. HP5+ film (400 ISO) on a sunny winter day, 1.5s.
The
camera is well made, the maker obviously knows a lot about pinholes. He
makes a large variety of other models. Having to handle a film plane
that long, it might be a good idea to sacrifice an expired roll to
learn how to handle the camera "at full day light". Try the film
advance, if it moves too hard, release tension by moving the other wind
knob simultaniously. If you do so, don't forget to straighten the film
if necessary.
Loading film
is a bit unusual due to the long curved film plane. Unscrew the 2
screws and lift the lid, the camera technique is attached to
it. Install the spools as usual, it's bendable
plywood to hold them, but it works well. Safely engage the film lead
and close the camera.
Look on red window. Advance
the film via the knob until the number "2" appears in the window. You
are now ready for the first photo. All further explanation supposes
that you loaded 100 ISO negative film.
The camera come with a short manual, you can either judge
exposure time via the table on the manual sheet or you use a
light meter. Except very expensive special professional light meters you won't find
f/300 on your meter. Mine has f/90. The row is: f/22, f/32, f/45, f/64,
f/90, f/128, f/180, f/256, f/360, f/512. On this camera the f/300 (which is quite common as f-stop) is half a stop between f/256 and f/360. So it's 3 1/2 stops from f/90 on my meter. You have to count 3 1/2 more steps on your scale if
present. Or double the reading 3 1/2 times.
Example: on a fine,
sunny day your reading at f/90 is 1s. 3 1/2 steps or 3 1/2 times doubling
gives 12s (1x= 2, 2x= 4, 3x= 8s, 3 1/2x=12s). Then there is a
second factor, called reprocity failure. For long exposure times the
film needs more time to expose than a mathematical row would give. The
factors are:
1s x 1.25
5s x 1.5
15s x 2
45s x 2.5
2m x 3
5m x 4
10m x 5
20m x 6
Our
result was 12s, which is near to the 15s factor of 2. 12s x 2 = 24s.
Even if it's a rough calculation, with modern film you will have usable
results.
This is just a help, it's not scientific. If you want more
precision, please have a look on the web. In any case you will need a
tripod, otherwise you will have blurry photos by shake.
With
fast film you will have shorter exposure times and avoid calculating
the reprocity factor. And you can cheat your light meter by lowering
the ISO value to avoid calculating at all. For the photo shown above I
had 400 ISO film. I set the meter to f/90 and 40 ISO (our 3 1/2 steps
again, 1x 200 ISO, 2x 100, 3x 50, 3 1/2 40 ISO). The meter read a bit
over 1s, so I tried 1.5s, which was fine. For 100 ISO film and F/90 it
would be 9 ISO (1x 50, 2x 25, 3x12, 3 1/2x 9 ISO). My light meter goes
as low as 3 ISO. So no calculating and tables at all.
Having
taken your photo you have to advance your film to the next picture. As
the film numbering visible in the red window is for 6x6
format and you are using the triple, 6x17, you have to
advance to 5...8...11. DO NOT FORGET
THIS. Fortunately the maker inscribed the numbers on the lid of the red
window. So with 6x17 format the last (4th) photo is at "11", and then
it's over! The red window sits quite deep into the housing and it's
glary plastic, so the faint numbering of Ilford film is a bit hard to
see.
The
Vermeer 6x17 is a nice, solid and well made pinhole camera. The curved
film plane avoids vignetting indeed. It lacks a bubble level, easy to
find for cheap, and an aiming device. I will have a 9x17 viewfinder
custom made soon. Then it will be perfect.
If you are interested in this camera, here is a link to the maker's website. He makes other pinhole camera models as well.